Showing posts with label hair. Show all posts

2014/09/24

Tips and Tricks for dyeing hair naturally

I've been meaning to write this post for the longest time now. I've been on the natural hair dye path for a little over a year, and I'm truly loving it, so I thought it would be high time to share my story and some tips and tricks I've learnt along the way.
This is what my hair looked like before my first natural dye and after my second time dyeing with henna and indigo. As you can see from the before picture, my hair was in pretty bad shape. The color that came out of the box faded quickly, and tried my hair,  so I had lots of problems with frizz and split ends. I have pretty weak hair naturally, so it didn't handle chemical dyes very well. Despite that, I had used chemical dyes for many years up to that point, going from blond highlights to red to blond to brunette to light brown to caramel. Yikes! (Make up your mind already, right?)
So, last summer I decided it was time for a change. I had admired Elle's beautiful henna-dyed red hair, and Anneliis' shiny henna-indigo-dyed hair. And, after dyeing Marita's hair with henna, I was pretty much sold. Just a couple of months later I was ready to take the plunge myself.

Here's a few tips and tricks if you're thinking about going natural:

1. Natural dye can only make your hair darker or redder. There no way to go lighter with natural dyes. So, natural dyes are perfect for you, if you'd love a ginger shade or would love a warm brunette color. The main dyes used are henna and indigo, but you can add amla to cool henna if you want a colder brown.

2. It's hard to go back to chemical dyes. So, here's the thing. Henna, indigo and other natural dyes don't strip the surface of the hair, but rather build upon it, filling up all the pores. Which means that when you ever want to go back to a chemical dye, it won't stick. Then again, after you've seen your hair get shinier and healthier, is there really any reason to go back?
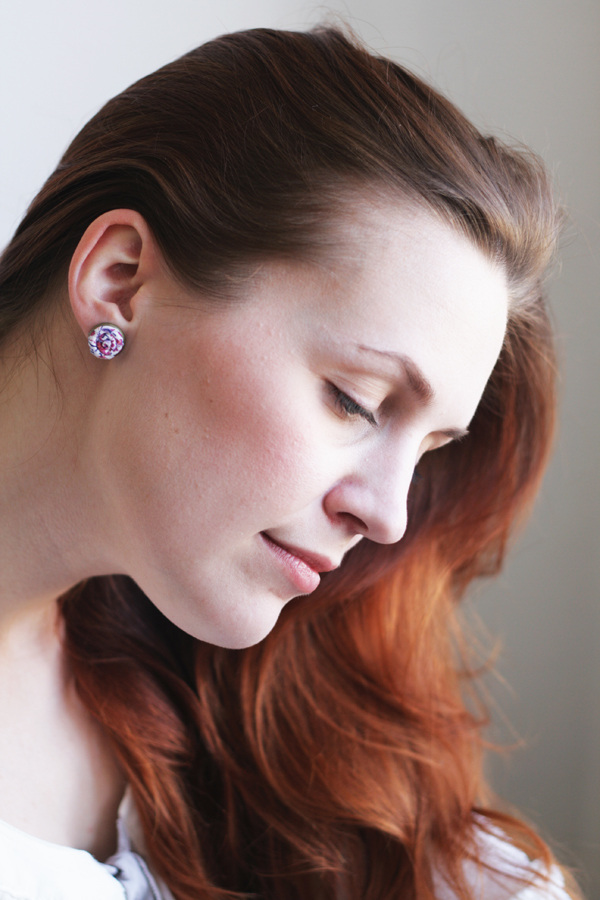
3. The color of the dye-job is harder to predict than with chemical dyes. Yes, they both depend on what color you had previously, but the magnitude of change with natural dyes is more restricted. As I said earlier, it attaches to the surface of the hair strands, so basically it's translucent. For me, that meant that the part of the hair that was pre-dyed a lighter shade remained lighter after dyeing with henna and indigo, and it continues to be lighter even after multiple dye-jobs. I'm loving my slightly ombre hair, but this is something that you need to consider when choosing natural dyes.

4. Dyeing hair naturally comes with a lot of experimenting. You can never be 100% sure which color your hair turns out. I knew I wanted something towards chestnut, so the first time I mixed 2 parts henna to 1 part indigo. Over the year I've added more and more indigo, so that now I use a half and half mix. But, the experiment is half the fun, I think.

Also, Indigo fades faster than henna. This is something I didn't notice in the first months, since my shade was more towards red anyway, but I've started noticing it more now that I've gone more towards the brunette side. You can even see that the shampoo turns a blueish color for the first week after dyeing.
6 weeks after my last dye-job.
5. Natural dyes makes your hair sleek and super shiny, and the shine doesn't fade. So, even 2 months after your last dye-job you'll have shiny and pretty hair. And, you'll notice how much healthier your hair will become.

Note of warning though. Since henna needs an acid to release the dye, it's good to nurture your hair with moisturizing masks after dyeing. I've mostly just noticed some dryness in the ends and used a coconut oil mask after a dye job.

6. You don't have to dye all your hair every time. While I find it's good to do a complete dye-job every 6 months, just touch up those roots in the mean time and use a gloss to even out the rest of the hair if necessary. For a gloss, just mix together a lot of hair conditioner with left-over dye from dyeing your roots and apply it to the full length of your hair. It's dye and a mask in one. Win-win!
3 weeks after my last dye-job
7. The dye starts running after a couple of hours after application (the recommended leave-in time is 3-4 hours), so have some tissues handy or place them on your neck right after application.

8. My roots blend better with the dye. Since natural dye is translucent (so my natural hair color is peeking through), I've noticed that my roots are not that noticeable even if I'm way over-due for a touch up.

Although dyeing with natural dyes can be a little bit more tricky and definitely more time-consuming than with chemical dyes, I've never looked back, and I'll probably keep dyeing my hair naturally for a long time.

Update! Here's a great resource for all things henna. A lot of useful information and transformation stories.

I hope this is helpful to those thinking about going natural.

xo. Hanna


Follow on Bloglovin

2014/08/27

Our Wedding // Let's talk about wedding dresses, hair & make-up

Wedding make-up
Hi, guys! Today I'll be sharing my tips and tricks on wedding hair and make-up, and the story of my wedding dress.
First, let's talk make-up. I had initially planned to ask a friend to do my make-up on the big day. And, we even did a test, but eventually I felt that I wanted to do it myself. First, because I'm a control freak (just kidding....well, sort of). Secondly, because I knew that I wanted a very "me" look, so that my husband wouldn't be all "who's that?" on the wedding day, and I already new what I wanted and how to achieve it, so it made simply more sense to do it myself. Also, my wedding was very much DIY, so I liked the aspect of keeping in that spirit.
doing your own wedding make-up
I watched some videos on Youtube, and did some testing at home until I was a 100% happy with the end result. Of course, I had a fear I would mess up everything on the actual day - it's like when you do a hairstyle just for fun to see how it looks like, and then it turns out awesome, and the next time you need to replicate it, it just doesn't come out. You know what I mean? Luckily, everything did turn out on the big day, even better than I had hoped.
Natural look for a wedding
So, my experience is, that doing your own wedding make-up is totally doable, but only under certain circumstances. I was already pretty good at doing my make-up for special occasions since I had a lot of concerts. If you love playing around with make-up, and you think you're doing a good job, then why not do it yourself. There are so many great make-up tutorials out there to help, also.
Moments to capture on a wedding day 
For a very brief moment I even considered doing my own hair. But, I knew that would be super stressful, and I really wanted to relax and not worry about it (since, you know, the Murphy's law I described before). I'm so glad I decided to take on a hair stylist. She is the greatest! She is a friend of friend. Me and Rein both have our hair cut by her, and I'm always so pleased with her work. So, if you live in Tallinn or in the area, you should definitely pay her a visit. Her name is Mari-Liis Must and she works at the young hairdressers' salon called Tuuletuka
Messy curls hairdo for the bride
Mari-Liis and I did 2 tests before the wedding day to see how my hair responds to different curling methods and products and how the whole thing holds up after several hours. I would definitely recommend doing a couple of tests, since you can try out more things and get the game plan ready.

I gathered some inspiration images before our first appointment to help share my vision. I was sure I wanted something not too clean, more of a messy curls look. And I also had the idea of having flowers in my hair from the start. My Mom also had flowers in her hair when she got married, so I wanted to carry on that detail and maybe make it a family tradition. I made the flower pins myself using this method I shared over at Oh Everything Handmade a few months back. I really loved the end result!
Handmade wedding dress
Now, to my dress. Isn't she gorgeous! I know I'm biased, since I designed it myself, but to see that vision come to life even better than I had imagined truly makes me so happy. I also played around with the idea of making it myself, but eventually I didn't dare to put myself under so much pressure.
The dress was made by my mother-in-law, who's an amazing seamstress. Fun fact,  she actually produced three dresses that attended our wedding - mine, her's and her mother's. Did I say she's amazing?

We began working on this dress somewhere around april, but the actual sewing part started in June. I sent her tons of pictures of how I wanted the neckline to be, and how I envisioned the back and the skirt and so on. And we had several talks so I could really communicate my design vision to her. Then we went to shop for the fabric. That was the hardest part. Initially, I had my heart set on using Venise lace, but turns out that is impossible to get locally, and I didn't have the guts to spend all that money to order it from somewhere not knowing if it was going to look and feel right. So, we made a quick change in plans. I'm actually very glad we did, because in hindsight, Venise lace would probably have been to thick and heavy for this dress.
Gorgeous wedding dress
The trickiest part of the dress was figuring out how to construct the lower part of the skirt. I wanted sort of this soft cascading tulle look, but neither of us had sewn anything like it before, so we had to figure out how to achieve the look I wanted. A lot of cutting and tulle later, it was perfect.
Navy blue + cream
Our wedding colors were navy blue and pale salmon pink, so I also had a navy blue fabric belt, and pink crystal earrings (I made those, too). And my mother-in-law also made Rein the matching tie and handkerchief from the same belt fabric.
Gorgeous mermaid-style wedding dress (designed by Pearls & Scissors) 
Beautiful low back mermaid wedding dress
My wedding look was exactly how I imagined, and I'm so grateful to Mari-Liis and Kristine (my mother-in-law) for making it a reality.

Phew, you're such a trooper if you made it to the end of this very long post, but I felt I just had to share. So, thanks for letting me!
If you have any questions, just leave them in the comments.

Thanks so much for visiting, and I'll see you tomorrow!
xo Hanna

Photography by Kerli Halliste

Follow on Bloglovin

2013/05/11

Dying your hair naturally with henna


Today's topic is a little bit different from our usual posts, but since you've complimented on Elle's and Anneliis' hair, I thought you'd like to know more about the secret to their beautiful hair color. Some of you may be familiar with henna and other natural dyes, but I thought I'd share some resources and one amazing henna transformation.


After seeing Elle's gorgeous hair, and a little push from me, Tamar's sister Marita agreed to give henna a try. She'd been sending me pictures of beautiful redheads and talking about going red, so I thought I'd just give her a little nudge to go through with it. The good thing about henna, besides being all natural and good for you hair, is that unlike chemical dyes, it only covers the surface of the hair, therefor not harming the structure of your hair resulting in a beautiful shine.

In the above picture you can see Marita's hair before dying. At this point, she had three different hair colors: her natural dark blonde out-growth, then a dark blonde dye job (used to be a little more ginger), and then the dark brown chemical dye that she had before. She'd been trying to go lighter, but as we all know, there's no returning from a dark brown chemical dye.


Here's Marita's hair after dying with henna. I think it looks so beautiful! Don't you agree? Although there's still a difference between the upper part and the lower part of her hair, it's so much more subtle. And the color really suits her pale complexion and green eyes.


Here's what Marita had to say about the whole experience:
"Dying my hair with Henna was the first step in my hair makeover process. I've since made even more changes to my hair care routine like changing my hair brush, and using natural hair care products. I also don't blow-dry my hair, but let them air-dry instead. All of this has benefited my hair greatly. It used to be tangled and frizzy, it grew very slowly and I had a lot of hair falling out. After making these changes, my hair has become so much softer, yet stronger, the falling out has decreased, and my hair is growing faster.
Although the dying process is so much longer than with chemical dyes, it's well worth it. Even more, it makes you think more about what you do to your hair with those chemical dyes. I definitely plan on continuing to dye my hair with henna."

If you'd like to know more about henna and other natural dyes, here's a great resource.

As always, we'd love to hear your thoughts! If you have any questions or thoughts on this topic, leave them in the comments below.


2013/04/12

Braided Updo Tutorial for long and thick hair


Elle's sister Anneliis has the most gorgeous thick hair I have ever seen. With that beauty also come some challenges. Her hair is so thick and heavy that it's hard for her to put it up. So, she asked me to come up with a simple enough updo that she can manage to replicate herself, and that would hold her hair firmly and last for more than 10 minutes.


As you can see from the pictures above, her hair is very long and very thick. But, oh so gorgeous!
Here's the updo I up with:


1. & 2. Take the upper section of your hair on one side and simply braid it.
3. Anneliis parts her hair on the side, so I did a side braid on the other sides upper section. Here's the tutorial on how to do it. You can opt to do a simple braid on the other side as well.
4. & 5. Now you have two braids that meet at the center back.
6. & 7. Take the unbraided portion of the hair and twist it into a simple bun. Make sure to secure it tightly with a hair elastic.
8. Push the bun back against the head and secure firmly with pins. Girls with lots of hair should try to find those super long pins that can almost go through their thick bun.
9. Take the first braid you made and twist it around the bun.
10. Tuck the tip of the braid underneath the start of the braid and secure it with a bobby pin or two under the second braid.
11. Take the second braid and twist it around the bun making sure you cover the end of the first braid.
12. Secure the tip of the second braid with a couple of bobby pins (you can customize them with buttons) and secure the bun with extra pins to hold the braids in place.


Anneliis said that the hair-do did stay in place for hours, but started to bother her because the short pins I used (that are plenty long for my own hair) started to scratch her scalp. I guess we need to find her some new pins. 

2013/04/05

Messy Dressy Up-do (tutorial)


If you notices my messy but dressy up-do in my concert gown pics and liked it, you're in luck today because I'm sharing the tutorial. It's really a very simple up-do that can be worn everyday, but also to special events. I've had three concerts this week, and I've used this up-do as the basis for all my concert hairdos. It simple, and pretty foolproof, aka the perfect solution if you're in a hurry and need to succeed at the first try.


Now wasn't that simple?


You can add some festiveness to the 'do by adding sparkling hairpins. Instant formal look. Simple yet pretty!


Happy trying! Let me know what you think in the comments below!


2013/02/22

50s inspired casual hairdo


Hey everyone! Today I'm going to show you some tips how to wear your hair in a slightly pin upish style!
I love to do it when I have curls. I never do curls with heat, I always do them with headband and with no hair styling products.

  • Firstly after taking headband off, comb your hair to make curls a bit more loose.
  • Then  part your hair diagonally and work with both sides separately.
  • Make your hairline to about 3 sections and start to put them one by one to the side (but not too tightly!)
  • When you have all the sections on the side then twist them slightly upwards (so the last section that is nearest to your ear, goes on top of the first and the second section).
  • Attach it with hairpins.


Do the exact same thing with the other side.


And you are ready!


2013/02/20

DIY: Feather hair accessory


Hello guys! Today I'm sharing one of my latest projects with you - a hair accessory with feathers! It's really summery and fun, and adds playfulness and colour to your hair! It's really easy to make and I hope you'll enjoy it  :)


Be sure to click "read more" below to see the full tutorial!


2013/01/04

Curling without heat 2.0


You've probably seen this curling tutorial around the blogosphere, since it's been quite the hit lately. Curling your hair by twisting strands of hair around an elastic headband is really easy and sufficient, but if you have really thick hair like my friend Anneliis (here's a previous tutorial with her to give you and estimate how thick her hair really is), you might find it tricky to get all your hair around one tiny elastic band and get the results you're looking for.


I wanted to try and make this method work on Anneliis' hair. That meant doing a little modification to the standard technique. Instead of using one elastic band, we used two. Here's how:


2012/10/19

Homemade Spa Weekend


Is it just me, or does time really go by faster every year? It seems we're always busy and working, seldom taking time to relax and take care of ourselves. Although this weekend will be just as much about work as it is about play, I plan on taking time to relax and load myself with new energy. What better way to do that than with a homemade spa treatment in the sauna and reading a good book (Rene Fleming's "The inner voice") while the yummy masks to their job.

1. / 2. / 3. / 4. / 5. / 6.

Here are some additional resources for homemade spa goodies:

1) Nourish your hair with these and these all natural hair masks.
2) Take care of your skin with homemade facials and masks.
3) Give yourself a healthy glow with these wonderful body scrubs.

I plan on taking a couple of hours all to myself and giving some of those recipes a try. Have any good homemade beauty recipes to share? Let us know in the comments!

What are your plans for the weekend? What do you do to unwind and reload?

2012/10/05

How to combine a French braid and a Fishtail braid


While I was doing my hair for the last photo shoot for the blog, I was thinking of new ways to braid my hair using the same old techniques. I came up with this French braid and fishtail braid combination and wanted to share a closer look at it with you as well. Once you've mastered the basics of braiding there are hundreds of possibilities to combine them into pretty hairdos.


Here are the steps to recreate this look:

1) Braid your bangs (using this or this tutorial) up to your ears, then braid the tail until the end and fasten with a clear elastic.
2) Gather all your hair into a side ponytail and fasten. Braid the ponytail fishtail style (a good tutorial here). Pull here and there to add a little messiness and fluff to the braid.
3) Twist the bangs' braid around the ponytail and fasten with a bobby pin.

What's your favorite way of braiding your hair? Do you combine different techniques or usually use just one? Let me know in the comments!
Previous Post Home