Showing posts with label henna. Show all posts

2014/09/24

Tips and Tricks for dyeing hair naturally

I've been meaning to write this post for the longest time now. I've been on the natural hair dye path for a little over a year, and I'm truly loving it, so I thought it would be high time to share my story and some tips and tricks I've learnt along the way.
This is what my hair looked like before my first natural dye and after my second time dyeing with henna and indigo. As you can see from the before picture, my hair was in pretty bad shape. The color that came out of the box faded quickly, and tried my hair,  so I had lots of problems with frizz and split ends. I have pretty weak hair naturally, so it didn't handle chemical dyes very well. Despite that, I had used chemical dyes for many years up to that point, going from blond highlights to red to blond to brunette to light brown to caramel. Yikes! (Make up your mind already, right?)
So, last summer I decided it was time for a change. I had admired Elle's beautiful henna-dyed red hair, and Anneliis' shiny henna-indigo-dyed hair. And, after dyeing Marita's hair with henna, I was pretty much sold. Just a couple of months later I was ready to take the plunge myself.

Here's a few tips and tricks if you're thinking about going natural:

1. Natural dye can only make your hair darker or redder. There no way to go lighter with natural dyes. So, natural dyes are perfect for you, if you'd love a ginger shade or would love a warm brunette color. The main dyes used are henna and indigo, but you can add amla to cool henna if you want a colder brown.

2. It's hard to go back to chemical dyes. So, here's the thing. Henna, indigo and other natural dyes don't strip the surface of the hair, but rather build upon it, filling up all the pores. Which means that when you ever want to go back to a chemical dye, it won't stick. Then again, after you've seen your hair get shinier and healthier, is there really any reason to go back?
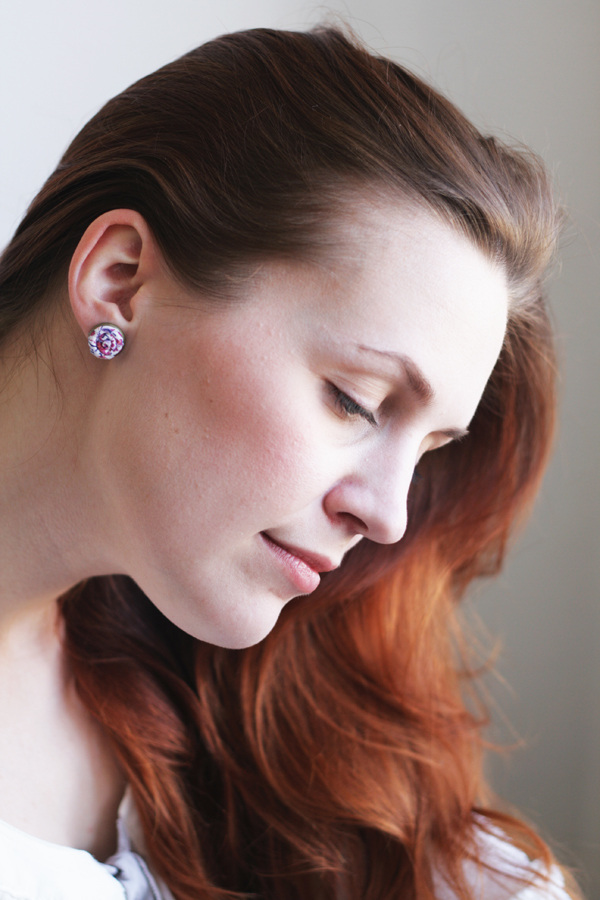
3. The color of the dye-job is harder to predict than with chemical dyes. Yes, they both depend on what color you had previously, but the magnitude of change with natural dyes is more restricted. As I said earlier, it attaches to the surface of the hair strands, so basically it's translucent. For me, that meant that the part of the hair that was pre-dyed a lighter shade remained lighter after dyeing with henna and indigo, and it continues to be lighter even after multiple dye-jobs. I'm loving my slightly ombre hair, but this is something that you need to consider when choosing natural dyes.

4. Dyeing hair naturally comes with a lot of experimenting. You can never be 100% sure which color your hair turns out. I knew I wanted something towards chestnut, so the first time I mixed 2 parts henna to 1 part indigo. Over the year I've added more and more indigo, so that now I use a half and half mix. But, the experiment is half the fun, I think.

Also, Indigo fades faster than henna. This is something I didn't notice in the first months, since my shade was more towards red anyway, but I've started noticing it more now that I've gone more towards the brunette side. You can even see that the shampoo turns a blueish color for the first week after dyeing.
6 weeks after my last dye-job.
5. Natural dyes makes your hair sleek and super shiny, and the shine doesn't fade. So, even 2 months after your last dye-job you'll have shiny and pretty hair. And, you'll notice how much healthier your hair will become.

Note of warning though. Since henna needs an acid to release the dye, it's good to nurture your hair with moisturizing masks after dyeing. I've mostly just noticed some dryness in the ends and used a coconut oil mask after a dye job.

6. You don't have to dye all your hair every time. While I find it's good to do a complete dye-job every 6 months, just touch up those roots in the mean time and use a gloss to even out the rest of the hair if necessary. For a gloss, just mix together a lot of hair conditioner with left-over dye from dyeing your roots and apply it to the full length of your hair. It's dye and a mask in one. Win-win!
3 weeks after my last dye-job
7. The dye starts running after a couple of hours after application (the recommended leave-in time is 3-4 hours), so have some tissues handy or place them on your neck right after application.

8. My roots blend better with the dye. Since natural dye is translucent (so my natural hair color is peeking through), I've noticed that my roots are not that noticeable even if I'm way over-due for a touch up.

Although dyeing with natural dyes can be a little bit more tricky and definitely more time-consuming than with chemical dyes, I've never looked back, and I'll probably keep dyeing my hair naturally for a long time.

Update! Here's a great resource for all things henna. A lot of useful information and transformation stories.

I hope this is helpful to those thinking about going natural.

xo. Hanna


Follow on Bloglovin

2013/05/11

Dying your hair naturally with henna


Today's topic is a little bit different from our usual posts, but since you've complimented on Elle's and Anneliis' hair, I thought you'd like to know more about the secret to their beautiful hair color. Some of you may be familiar with henna and other natural dyes, but I thought I'd share some resources and one amazing henna transformation.


After seeing Elle's gorgeous hair, and a little push from me, Tamar's sister Marita agreed to give henna a try. She'd been sending me pictures of beautiful redheads and talking about going red, so I thought I'd just give her a little nudge to go through with it. The good thing about henna, besides being all natural and good for you hair, is that unlike chemical dyes, it only covers the surface of the hair, therefor not harming the structure of your hair resulting in a beautiful shine.

In the above picture you can see Marita's hair before dying. At this point, she had three different hair colors: her natural dark blonde out-growth, then a dark blonde dye job (used to be a little more ginger), and then the dark brown chemical dye that she had before. She'd been trying to go lighter, but as we all know, there's no returning from a dark brown chemical dye.


Here's Marita's hair after dying with henna. I think it looks so beautiful! Don't you agree? Although there's still a difference between the upper part and the lower part of her hair, it's so much more subtle. And the color really suits her pale complexion and green eyes.


Here's what Marita had to say about the whole experience:
"Dying my hair with Henna was the first step in my hair makeover process. I've since made even more changes to my hair care routine like changing my hair brush, and using natural hair care products. I also don't blow-dry my hair, but let them air-dry instead. All of this has benefited my hair greatly. It used to be tangled and frizzy, it grew very slowly and I had a lot of hair falling out. After making these changes, my hair has become so much softer, yet stronger, the falling out has decreased, and my hair is growing faster.
Although the dying process is so much longer than with chemical dyes, it's well worth it. Even more, it makes you think more about what you do to your hair with those chemical dyes. I definitely plan on continuing to dye my hair with henna."

If you'd like to know more about henna and other natural dyes, here's a great resource.

As always, we'd love to hear your thoughts! If you have any questions or thoughts on this topic, leave them in the comments below.


Previous Post Home