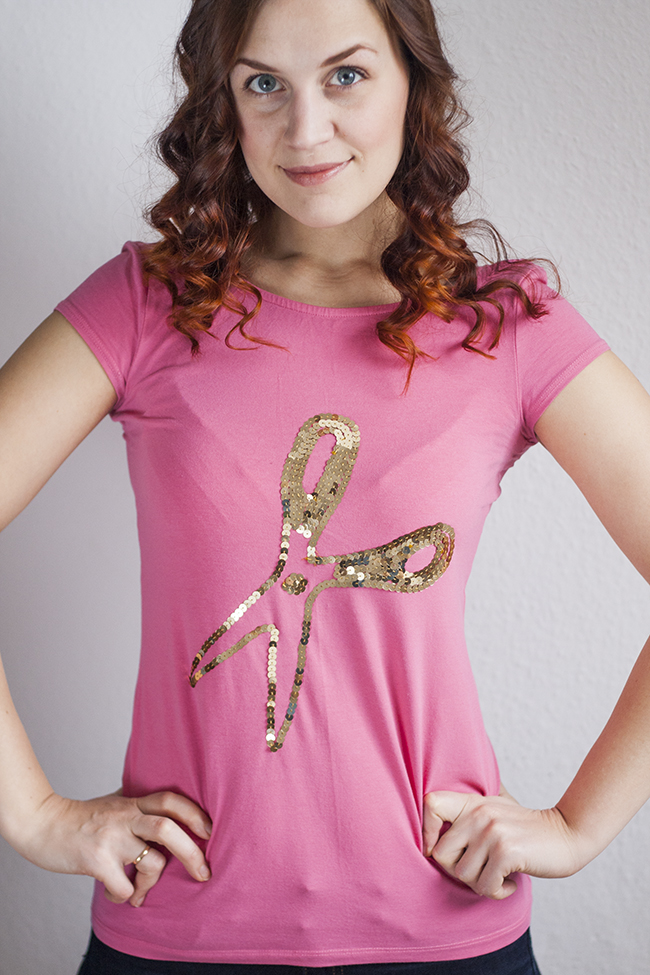
I rarely wear simple T-shirts, but I got this pink one for our
engagement photos. Since it was pretty sad in my closet, I thought I'd spice things up. And, what better way to do it than to add some sparkling scissors. This one has Pearls and Scissors (literally) written all over it!
I made this project for the Mood magazine a couple of months ago. You know, doing DIY projects as a job is so much different than just doing them for fun. It's a little like making something for someone else and you don't exactly know what they like. But, I still try to come up with things that I would actually love to make for myself. After all, I'm the one who has them in my closet once the article's been published.
Luckily, so far I've loved most of the projects I've made. And this one is definitely 100% me!
This is what you need:
- T-shirt
- Glitter string
- Big scissors
- Fabric pen or other fabric marking tool
- E6000 glue or fabric glue (+ a match or toothpick for precision glueing)
STEP 1
Put the scissors on the T-shirt the way you want them and trace around the scissors with a fabric pen or any other fabric marking tool (like Taylor's chalk or a chip of soap).
STEP 2
Use a toothpick or match to apply some glue to the back of the glitter string and start glueing it along the template line. After i did the outer line, I went back and covered the inside of the scissor handles as well. Finally, I added the little joining screw out of sequins.
A tip I would have to cover the end of the string with a few loose sequins whenever you need to cut and restart.
It's a very quick and easy project, and holds up very well in the wash. Also, your kids/cousins/nephews and nieces/any other small children can pull on scissors (which they will) and the glue will hold. It's babysitter proofed, so you can take my word for it!
If the
Start Sewing Club had an official club T-shirt, this would be it. I love this T-shirt more than any other I've owned. It's definitely getting a lot of wear these days, which in my book is the best indication of a DIY success.
I've been welcoming the first members to the
Start Sewing Club and I couldn't be more happy about it! I'd love to have you as well, so do consider joining. (Have you seen the video introduction yet?)
There won't be another club before Fall. And, the next one will have all new projects. You will have lifetime access to the classes in this edition of the Club, so if you think you'd like to take them,
get them now for a good price! Also, if you hop on the mailing list below, you could still catch the earlu bird special I have running for the list only ;)
I'd be beyond excited to have you in the club!
xo, Hanna