Showing posts with label beginner. Show all posts

2015/04/14

DIY a pair of sparkling sequin stud earrings

Sometimes, ideas come to me out of the blue. Well, not exactly out of the blue, but unexpectedly, while I'm creating something else. So, when I was making these sequin and pearl earrings, I was thinking about what a great texture a pile of sequins create, and boom, the idea for these earrings was born. Because, wouldn't it be cool if you could incorporate that texture into a piece of jewelry? Of course it would!
You will need:
1) Felt
2) Scissors
3) Sequins (c/o Pandahall)
4) Super glue (like E6000)
5) Earrings studs
1. Cut out 2 pieces of 2x2cm felt.
2. Cover one piece with glue and start glueing the sequins to the felt. I started by placing the corner-sequins first, and the filling the outer frame and moving inward from there. 
3. With E6000 you can adjust the positioning of the sequins when the glue is still wet.
4. This is how one of my earrings looked after the first layer of sequins. Now would be a good time to let that one dry and do the other.
5. Add another layer of sequins on top of the first layer. Make sure to place the sequins in between the lower layer ones, not directly on top of. This will create a cool texture.
6. Once the glue on the sequins has dried completely, glue the studs to the backside of the felt. Let dry and start sparkling!

I'm totally diggin' these studs! Now, all I need is a party to go to, so I can sparkle around in these. Of course, you're welcome to wear them every day of the week if your shiny like that.

Cheers to unexpected ideas!

xo. Hanna

P.S! If you want to get even more DIY ideas, news, and behind the scenes peaks into new products, join the mailing list by clicking the button below!

2015/04/08

DIY Upcycled Knotted Jersey Headband

As promised, I'm here to share a quick and easy project for all of you who want to give sewing knits a try. This headband takes you just half an hour (tops) to make and makes the perfect project to practice those knit stitches on. Try it once and before you know it you'll have a stack of pretty headbands. It's addictive!

You can play with different types of knits and different colors and patterns to mix up your own variation of it. I tried three different styles, and love them all. I might even make a few more - one for every outfit, haha. And these are not just for adults. I tried one of mine on my 4-year-old cousin, and she looked so adorable. (Granted, she hates having anything stuck on her head, but she looked dang cute for those 30 seconds).
 What you will need for this project:
1) A little bit of jersey fabric (or lace) - I cut my material from old t-shirts, lace tops and scraps of left-over fabric.
2) Basic sewing equipment (machine, needle and thread, pins, scissors, iron and ironing board)
4) Cardboard for the template
5) Ruler and pencil
STEP 1
First, you need to make 2 templates. One for cutting out the pieces, and the other one for ironing. You can see the measurements of the headband template on the upper picture. It includes 1cm wide seam allowances, but if you have a bigger than average head (I measured my head the way I would wear the headband and got 55.5cm), you might add a couple of cm to the length of the piece.

NOTE! I've had a reader point out that their headband came out too short. This might be due to different stretch of the fabric, or partly because of wider seam allowances or just a slightly bigger head. For this reason, I suggest measuring your head before making the pattern. Given that the fabric has good stretch, the headband should be about 10cm longer than your head circumference. Also, don't be afraid to stretch the headband when knotting it. I stretched mine quite strongly to make the knot comfortably. I'll try and add a video of that soon!

The ironing template is slightly smalles and will come in very handy later in the tutorial. The ironing template needs to be cut from cardboard. 
STEP 2
Cut 4 pieces of fabric using the headband template. Sew 2 of them together (right sides facing) and press the center seam allowances on both other pieces.
STEP 3
Place the two single pieces on top of the sewed piece right sides together and pin them in place. Be sure to pin to match the centers.
I don't know if you noticed, but I pinned the pink piece to the pink and white to white on the above photo, but I had to do it over, because I wanted to be like a chess board (white on pink, and pink on white). 
STEP 4
Sew the pieces together with a 1cm seam allowance. I used a lightning bolt stitch here, but you could use any of the three stitches I showed in this post
STEP 5
Cut the seam allowance to just a few millimeters to reduce bulkiness, and give the seams a good press. 
STEP 6
Turn the headband inside out. 
STEP 7
Use the ironing template to press and form the headband. Just shove the cardboard template into on half of the headband and give that side a good press. Then remove and repeat with the other side. This makes getting a good shape very easy. 
STEP 8
Lastly, hand-sew the center opening shut. 
Now, wasn't that easy? But if you have any questions, you can always just ask in the comments, and I'll do my best to clarify.

A little-known fact about me is that I have a very oddly shaped head. It's narrow, which makes finding a headbands that fit pretty hard. Also, most fabric headbands (and scarves for that matter) won't stay on for more than 2 minutes. But, I actually managed to wear this one for a whole day. Wow! So, I made myself three (lol). 

Happy sewing!
xo. Hanna

2014/11/05

DIY Painted Wooden Beads necklace

Although I love the statement necklace trend, I don't own very many. When it comes to jewelry, I'm more of a earrings type. I don't wear necklaces nearly as often as I'd like to. And, I think part of the problem is that I don't like spending money on trendy jewelry that might not get as much wear or might go out of fashion next year. So, I thought I'd make myself a necklace that would be bold enough to make a statement yet subtle enough for my taste.
 This necklace is super simple to make. You don't even need fancy jewelry making equipment to create it. Just a few beads and nail polish is about it.

Supplies:

  • 3 wooden beads (1 with a diameter of 3cm, and 2 with 2.5cm)
  • Nail polish in the color of your choice
  • Tooth picks
  • Shot glasses or somewhere to hang the beads to dry
  • necklace chain (as long as you want the necklace to be)
  • hook-eye closure
  • 2 small 5mm connection rings
  • /or buy a ready made chain necklace

 STEP 1
Choose three bold nail polish colors for your necklace design. I chose teal, orange red and turquoise.
 Insert a tooth pick through one of the beads and start painting half of the bead in the first color. Once you're done, set it on the shot glass to dry.
Repeat with the other two beads and nail polish colors.

 STEP 3
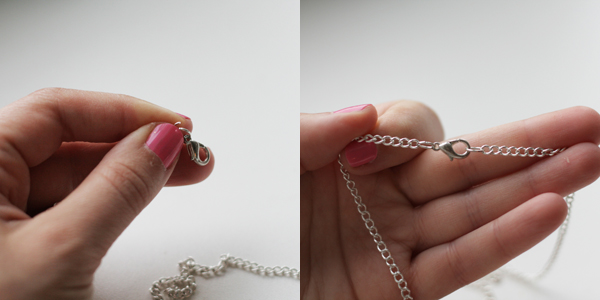
Pull one of the connection rings open, insert the hook closure and one end of the chain, and push it back closed. Then, take the other connection ring, pull it open and insert the other end of the chain, close the ring.
You can skip this step if you use a ready-made chain necklace.

STEP 4
Once the beads have dried, pull the chain necklace though the beads, and you're done!
Wasn't it simple? Sometimes, describing the making process is so much more difficult than the making itself.

I've gotten a lot of wear out of my necklace already, so I'm thinking about making another variation, maybe this time in metallics and black. We'll see...

Happy making!

xo. Hanna

2014/09/02

Refashionista: Adding a geometric pattern to a jacket with fabric paint

Hi, guys! I don't know about you, but I can get very attached to a piece of clothing. There are pieces I've worn 10+ years, and still love. So, it's especially sad, when one of those pieces gets ruined by stains. Which is exactly what happened to my white summer jacket.

I've had this jacket since forever. Actually, it was one of the first things I ever purchased at H&M. I got it on a choir trip to Germany after 10th grade, and I remember stepping into the famous store. H&M opened their first store in Estonia only last year, so going to one was always an abroad "must".
I've worn this jacket so much over the years, and it was still in great condition until I spilled grape juice over the back and the sleeve. How do you spill juice on the back of a jacket, you ask? Let's just say, that dripping straws get places. After about 5 attempts to get the stains out, I realized it wasn't going to happen, so I came up with another plan.

Being over-excited about fabric paints (proof here, here and here), it was a no-brainer really. So, I came up with the idea of covering the stains with a fun, colorful, tribal-inspired geometric pattern.

Here's what you need:
1) Old garment that needs a face-lift
2) Cardboard, pencil, scissors
3) Black permanent marker
4) Fabric paints

Here's how:

First, test your design idea on a sheet of paper of cardboard and see if it would fit the space you want to fill. I drew my idea up and cut away one of the bigger triangles to see if it would cover the biggest stain .
 1. Using your sketch as guide, cut out the elements you need for your design. I cut out 3 different sized triangles.
2. Place a plastic bag under the section of garment you're about to paint, otherwise the paint might run through to another layer of fabric.
3. Start drawing the pattern on the garment. I started from the center to make sure it's symmetrical, and that the stain gets entirely covered. Use the permanent marker to draw the outline of the first pattern piece on the garment. Be careful to double check the placement, since permanent markers really are permanent.
4. Continue to draw the pattern on your garment, completing the first row, and moving upwards from there.
5. Once the pattern is complete and your happy with the way it turned out, start painting the insides of the pattern pieces in the color-way of your choice.
6. Let the paint dry completely and then iron through a sheet of paper (or as instructed on the fabric paint bottles).
 Love this new colored pattern! An easy and fun fix for stains. I'm thinking of going with just 1 or 2 colors next time. Maybe something that's a contrast to the black. Or, I might omit the black line all-together, and makes just paint colorful triangles. So many options to try...
Hope you like this refashion as much as I do, and that you got some ideas for adding a pattern to an old garment.

Have fun crafting!
xo Hanna
Previous Post Home