Showing posts with label blouse. Show all posts

2015/05/10

Sewn // Maxi skirt & Pleated blouse

I've talked a lot about the Start Sewing Club on the blog over the past week, but I haven't properly blogged about the garments I made for the club. So, I thought I'd share a few (ahem...) photos of the finished projects that I made as samples for the club.

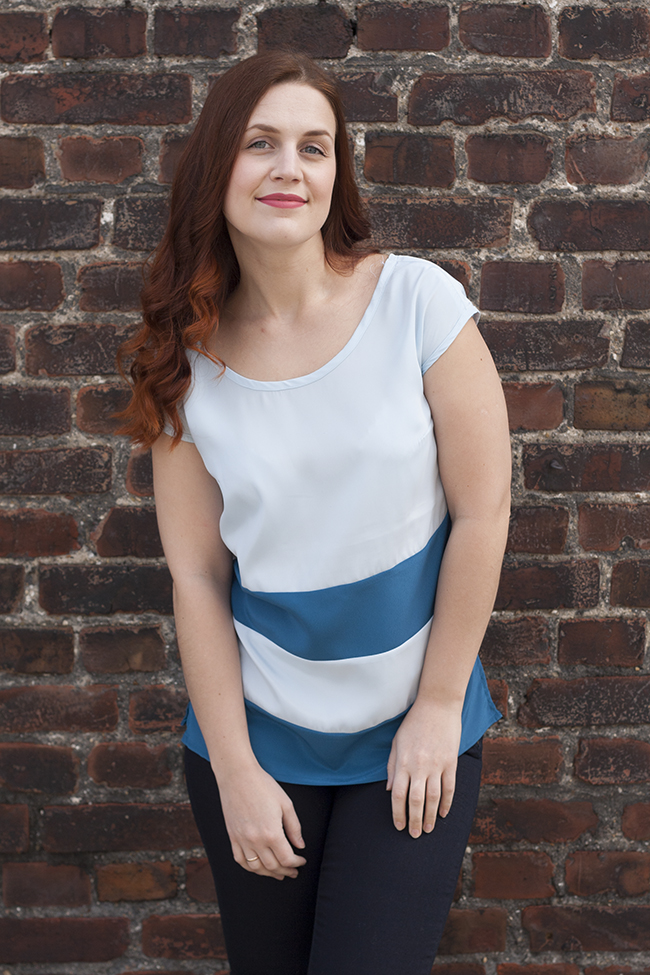
We did the shoot for the samples in a nearby park, and I love how they turned out. Hence the million photos about to follow. I've said this before, but every time Rein takes photos of me (aka 99% of the photos you see on the blog these days) I'm amazed by how much he's grown as a photographer over the past year. For instance, I didn't crop any of the photos from this shoot. I loved all the angles he shot! I'm seriously considering getting him into a photography course. I know this is totally unrelated to this post, but I'm just so proud of him.

Have you also noticed the improvement in the photography on the blog, or is it just me?
Back to the projects. I'm totally loving the maxi skirt! I'm actually contemplating wearing it to my best friend's wedding, but since I made it to be worn with flats, I'm not really sure.

I used a creamy pink slightly textured fabric I already had in my stash. I'm not sure about the fiber content, but if I had to guess, I'd say it's a cotton-viscose blend. It's a medium-weight and has a great drape. Luckily, I had just enough to make the skirt. I lined this one, since it was a tad too sheer. Adding a lining will be one of the bonus sessions in the course, by the way.
 My aim was to design something that would be very easy to create even for beginners. I know patterns can be a stumbling block for beginners, so I designed both my club projects to be made without a pattern to transfer and trace. This skirt, for example, consists of 2 rectangles, basically.

I know that a circle skirt is often suggested as a great first sewing project, but I actually disagree with that. Drafting a circle skirt is much more difficult than drafting a pleated skirt. Also, it's more difficult to sew, because of the curved hem.

Pleats, on the other hand, are so easy to construct and sew. And, there are have so many variations that once you've masted the basics of pleating and understand how to construct them, you can sew up a whole wardrobe full of different pleated skirt - each different from the rest.

I also wanted to leave out zippers. They can be intimidating for a beginner, and take the fun right out of sewing. And, I wanted to show that there are other ways to construct closures that don't involve the notorious zipper.
I carried the same principled onto the blouse. A very simple self-drafted pattern and no zippers. Also, no darts. A simple silhouette that would suit most body types was what I was after. I've been loving flowing loose-fitted deigns lately, so that's what I went for. You can always belt it is what I say.
To make room for our feminine curves, I added shoulder pleats, which also make pretty design features, I think. The width of the blouse and the fabric band create a faux capped sleeve. (Side note: the design is also very maternity-friendly)

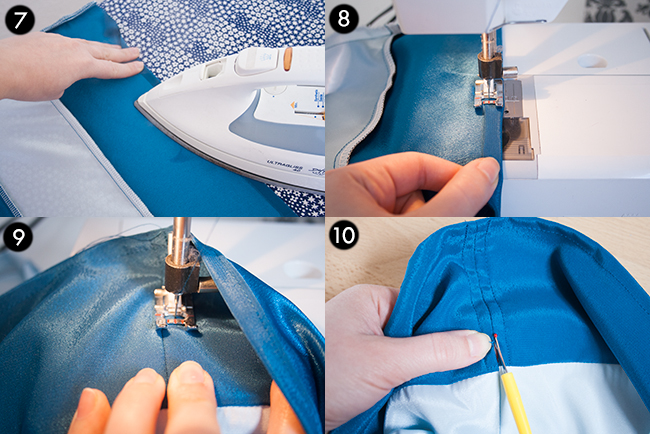
The pattern is again constructed based on a rectangle that is then modified in the course of the sewing process. This is a process I developed to make creating a self-drafted pattern very easy and straight forward. You don't need any knowledge of pattern-drafting - being able to hold a ruler is enough.
The fabric I used for the blouse has a story of its own. I got it from my Grandma a few years back. It's a vintage fabric she had kept in her stash for about 30 years. So, the fabric itself is older than I am. What I love about it is that it has an oddly modern pattern. Which shows how styles always come back in fashion.

I hope you enjoyed the look at my club projects, and the behind the scenes details. What do you like or dislike about the projects I created for the club? Did you get excited to create your own version? Tell me in the comments!

xo. Hanna

P.S! If you got inspired to maybe join the sewing course, you can get all the club details HERE


2015/04/03

Refashionista Basics // Lengthening a blouse with color blocks

I know Refashionista Thursdays were almost becoming a thing on the blog, but a Refashionista Friday is also cool right? So, a couple of weeks ago I said I was going to do more basic refashions over the course of the next few months, and today's refashion is all about a very basic fix.

How many times have you cast aside a blouse or a t-shirt that was just too short? I know I have done it numerous times. I have quite a long torso, so a lot of blouses tend to be too short for me. Adding some color blocks is just the perfect solution! Are color blocks still in vogue, by the way? You can make the blocks as colorful or neutral as you'd like - it's really up to you. 
I used teal blocks with this light blue blouse because it was in the same color way, but added just a bit of light-dark contrast. I tend to pick the more neutral path when it comes to colors because I always find styling really colorful clothing with other pieces in my wardrobe a challenge. But, if you're more adventurous, you could pick a completely contrasting color, or a patterned fabric, or even lace. There are many ways to go here, and they would all look equally awesome.
Funny story about this refashion is that I actually made this blouse myself a few years ago for my first Etsy collection. However, it didn't sell, and after I was done selling clothing on Etsy, I just kept it for myself. But, since I was not making it for myself, I had made it a bit shorter than would be ideal for my body. So, in my world, even the things I make from sctratch get a makeover sometimes.

 Here's the how-to:
 1) First, measure the desired length of your blouse and deduct the actual length to know how much length you need to add. I knew I wanted to add 20cm, because I really like longer tops at the moment. Then, think of how many blocks you'd like to do. I did two 10cm blocks, but I could have gone for three 7cm-wide blocks, or even four 5cm-wide blocks. That's completely up to you. (I was just feeling a little bit lazy, to be honest. I love sewing, but I love instant gratification even more.)
Once you have you block width figured out, cut the blouse into as many pieces as needed. I did 2 blocks, so I just cut off one 12cm-wide piece from the bottom. Why 12cm? First, I wanted all my blocks to be equal in width, and second you need to add sewing allowance to your block width.
2) Cut the color blocks from another fabric. So, I would recommend using the same type of fabric (satin with satin, cotton with cotton, jersey with jersey), or you could add lace as blocks (you know I love my lace), but then also match wovens with wovens and knits with knits. Just saves you a lot of headache is all. 
I used the cut-off part of the blouse to make sure the new fabric blocks were the same size. 
3) Lay out your blocks, so you can see you have all your pieces ready and for the ease of the next steps as well. It's especially useful when your blouse flairs out at the bottom, and your blocks are not the same size.
4) Zig-zag or serge the side edges of the block fabric pieces. Also, unpick the side seam of the cut-off blouse part, and about 5cm of side seam on the upper blouse part.
5) Sew the blocks together. I feel the easiest way was to sew the three detached pieces to one another in a random order and then attach that big block to the to blouse piece. I chose to sew the vertical seams before the side seams because I simply find it easier. 
6) Once all the color blocks are sewn together and attached to the blouse top, zig-zag or serge all raw edges and give all seams a good press with the iron. Ironing is so important, you guys! It makes everything look 100x better.
 7) Onto the hem! I alwyas always press the hem in place before sewing. When the hem is already flat, it's soooo much easier to sew. So, fold the hem and press. I usually even don't need pins to hold the hem in place after a good press.
8) So hem with a straight stitch.
9) After all that, I discovered the blouse needed side seam vents, because my bum is too big. You might not have this problem, so these last two steps are optional. 
For a side seam vent, just sew a parallel seam about 0.5cm from the side seam on both sides of the side seam (side much?). The seam looks like a rectangle with one of the shorter sides being the edge of the blouse. Makes sense? I should have added a line there with photoshop, but I hope you get it.
10) Use a seam-ripper to unpick the side seam inside the rectangle. And done!
Sometimes I find it so hard to gram a tutorial into one post, because really, there are always a lot of nuances that I don't get into since this has to be readable, right, but I feel like, if you're a novice sewer you might not no all these little things that seem like a given for a more advanced seamstress. 

Which is why I've been toying with the idea of creating some sewing courses. A lot of you have asked me about how I got started and some of your favorite posts seam to be the sewing ones. So, I'd love to hear from you! If I were to create a sewing mini course for beginners to learn the basics and get a wearable item at the end of the course, what would that garment be? Would you love to learn how to make a skirt? Or perhaps a blouse, or even a dress as your first garment? Let me know in the comments!

I'm also working on putting together a guide for getting started with sewing and some tips for sewing with knits, so there will be lots of support for you ready to start sewing very soon on the blog.

I wish you a wonderful Easter weekend!
xo. Hanna

2015/03/12

Refashionista Basics // Re-fitting a Granny Blouse

It's time to go back to the basics! Some of you told me you'd love to learn more basic refashioning skills, and I'm here to help. There's a time for turning dresses into skirts and sleeves into blouses, but most of the time, refashioning is about the simple fixes. So, over the next few months, I'm going to share some basic tricks and techniques for clothing alterations. Because let's be hones, most of the time we need to hem jeans, and replace a zipper, right?
Today we're tackling a granny blouse that had great bones, but a horrible fit. You can find these types of blouses in any thrift store. They have a very simple and wide cut, mostly in big sizes, which is actually a huge plus in my book (lot's of room to play around), but they look super baggy. 

I didn't want to make any radical changes - all I wanted to do was make it a few sizes smaller to fit my petite frame. Now, if you've ever tried to down-size a blouse like this, you probably ran into one or two problems. First, the bust. Well, most women have one, but the cut of this blouse is not curve-friendly. Which is why most times, just taking in the sides will result in boob-drama. Second, the shoulders. Mostly, smaller women have smaller shoulders, so taking in only the sides will result in droopy shoulder-lines. When you have broad shoulders, that might not be an issue, but usually it is.
One way to fit a dart-less blouse would be to add darts, but since a lot of beginner seamstresses are afraid of them, I thought I'd show you a simpler way to make room for your boobs (yep, I've said boobs twice in this post already) - adding shoulder pleats. 
Here's how the whole thing goes down.
 STEP 1 
Put on the blouse and pin the amount you'd like to take in the sides, and then pinch together the shoulder, so that the sleeve seam is exactly on the shoulder nook. Take the blouse off. By the way, a lot of the times I sew in my sports bra, because there's so much fitting involved and I can't be bothered to switch back and forth between shirts. 
 STEP 2 
Next, cut off the sleeves. Then, turn the blouse inside out, and draw a new side seam line with tailor's chalk. I didn't want to lose any width in the hips as a wanted this to remain a very flowy blouse, so I I drew it diagonally into the existing side seam at the lowest point possible. But, if you need to, of course go all the way down as your pins indicate. 
 STEP 3 
Now it's time to fix the shoulder and add the pleats for shaping. The pins indicate that I needed to remove 4 cm from the width of the shoulder, so I decided to add 2 pleats which would both take in 2cm. The pleats need to be at least 0.5cm apart, but 1cm is even better. So I needed to mark 2cm+1cm+2cm=5cm. Ideally, you'd want to position your pleats in the middle of the shoulder, or slightly towards the sleeve. Mark the the position of the pleats by marking the outer line of the first dart and the outer line of the last dart. Depending on how many sizes you need to go down, you might need to make more than 2 darts.
Draw the pleat lines at a 90 degree angle from the shoulder seam. The length of the pleats should be about 10cm. If you're very tall, you might add a couple centimeters to that, or if you have a very short upper body, you might make them a little shorter. You can adjust this after pinning.

Before pinning the pleats, rip apart the shoulder seam a little past the last pleat mark.

The green lines indicate the first pleat and the blue lines indicate the second pleat. The pink lines indicate a fold line. So, fold the fabric so that the fold-line is in the center of the fold and the green lines meet and the blue lines meet. The pleat itself should be on the inside/wrong side of the blouse.
 Pin the pleats, and try the blouse on. Make any changes necessary (maybe to the pleat length, or you might need to make the pleats bigger/smaller). 

Sew the pleats, and press (both to the same side). Sew the shoulder seam.Cut excess fabric from the blouse back following the front arm hole line. 
 STEP 4  
Next, it's time to re-fit the sleeves. Place the sleeves on the armhole so that the seam allowances overlap. Re-cut the upper curve if necessary. This part is a bit difficult to explain. You want your sleeve hole to always be a little bit bigger than your arm hole, because for the sleeve to sit right it needs to have ease at the shoulder. If you've ever sewn from a pattern, you'll have noticed that. But, since this was a loose-fitting blouse, I didn't have to worry about the ease that much. I needed to chop off a little from the top.
 STEP 5 
Sew the sleeves back on. Finally, and this is optional, I folded the sleeve hem up once and sewed it into place with small 1cm long seams in the middle and at the armpit. 

Give all the seams a good press and you're all done.
Shoulder pleats are a clever way to get some bust shaping without adding darts. This technique can be applied to most blouses and shirt that have need bust shaping. You could even use it to re-fit a men's shirt. This won't work on something you want to shape to be very fitted and snug. 

I actually debated turning this blouse into a minidress, as it is quite long, but decided a blouse would get more wear. Although, there might be a dress in that blouses future some day. I tried a belted version as well, and I'm not even sure which way I prefer it. What do you think? One thing I love about this blouse is the neckline, though. Isn't it gorgeous?

I hope this is helpful for some of you trying to master the game of refashioning. If you have any questions, let me know in the comments. There are not silly questions, so ask away!

xo. Hanna

2014/04/14

Refashionista: Blouse turned into a zippered jacket


Happy Monday, my friends! It's time to dive into another refashion. But first, I'd like you to meet my flatmate Mari Krõõt, the girl in this post's pictures. She's usually the one behind the camera, but today she's doing a little modeling. This was my first time sewing something for her, so I was a little nervous about whether it would turn out the way she likes it. It's so much harder to refashion for someone else since you don't know their style or taste as well as you know your own. And what seems like a fabulous idea to you might result in blank stares by them. So, I tried to consult with her as much as possible on this project.


This started as a cute blouse. The blouse was ok to begin with, but it didn't fit her and wasn't really her taste either. But, we both loved the color, so I knew it had potential. She didn't like any of the ruffled parts, but I convinced her to leave the sleeve heads as is, since they would need a complete reconstruction otherwise. We decided on a front zippered jacket-like look and I set to work.


As you can see, I made a lot of alterations. First, I deconstructed the front bodice, detached it from the back, and removed the hem elastic. Next, I took in the sleeves from the underarm seam, and added darts to the back bodice. Then it was on to the front bodice. I added shoulder darts to take in the extra fabric from the gathering, and to add some shape. I still had to alter the neckline - take off a couple of centimeters from the shoulders and lower it in the center. Finally, I added the zipper and re-hemmed the bodice.


This one was a lot of work, and we had to do a million fittings to get it to look good. I must say, it's still not my best work, but I think it turned out pretty great. This project taught me a lot. I'm so used to sewing for myself that making something for someone else with a different body type is really difficult. I know what looks good and work on my body, but with different proportions, these things don't apply anymore. I've already promised to sew her an evening gown this summer, so I'll get more practice then.


I think the jacket/blouse suits her, and I'm still in love with the color. I also love the new, more modern look that the zipper adds. Also, the puffy sleeves add a touch of femininity. So, it's balanced and pretty.


Follow on Bloglovin

2014/03/18

Refashionista: Choker/halter neckline makeover


This blouse sat sadly in my to-refashion pile for quite some time. I loved the beaded neckline, but not the fact that it was a choker and a halter, which made it a bit uncomfortable for me. Not to mention the neckband was attached in a way I just couldn't figure out how to wear. It just didn't look right. However, I really wanted to make it work because the color is this lovely burgundy, and the beading on the neckline is simply to die for. And, I got it from a friend, so I couldn't let it just sit in a pile unused. I finally figured out a simple modification that would change the whole game.


The first modification I did was to take the blouse in from the back seam. It was a couple of sizes too big. After that I moved on to the neckline alterations.

As you can see from the picture above, I removed the neckband, and then cut open the top of the blouse. That seam was totally baffling to me, so I solved the mystery by simply cutting it open. Now the neckline made much more sense to me. I decided I didn't want the neckband to tie in the back. So, after re-attaching the neckband in the front, I tried on the blouse, and pinned the ribbon to the sides on the back, creating an open back look. Finally, I cut off the leftover ribbon and attached the straps in the back. The sewing on this one was all done by hand.


I'm totally in love with the new look of the blouse! It's more functional and sophisticated. Not that the original neckline was that bad, but this is just more me, I guess. This project is the perfect addition to my performance wear. Since one of my sewing goals for this year was to create more performance attire, I'm especially pleased with this one. And, I already have the perfect skirt to pair it with.


I think I need to make a beaded belt to tie together the blouse and the skirt. Another project to add to my list. You finish one and another steps in its place. That's how the crafty mind works, my friends!

(Thanks to Mari Krõõt for the photography)


Follow on Bloglovin
Previous Post Home