


As you may have noticed I seem to be obsessed with buttons lately. Ever since I bought that box of vintage buttons, I've wanted to incorporate them in to every project I make. And the button clutch is just another form of my obsession. But, I love it so! I mean, look how fabulous the buttons make the clutch.

If you share my admiration, then be sure to click "read more" to see the making process and my tips for recreating this look.

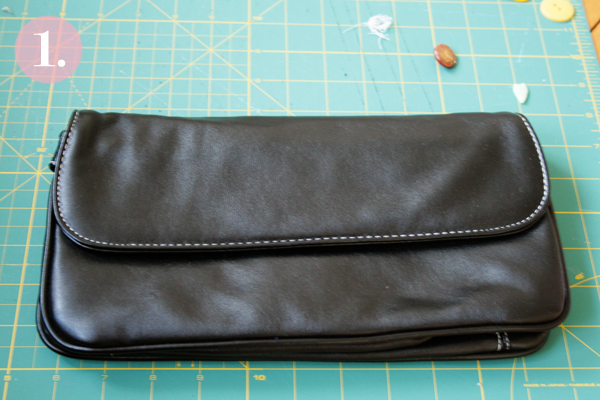
This is the handbag I started with. I thrifted this many years ago and haven't really used it that often. The strap was an odd length, so it wasn't very comfortable to carry around. Not that a clutch is very comfortable, but its pretty... And well, sometimes you have to sacrifice one the other.
The first thing I did was to cut off the handle to make it into a clutch. I used a permanent marker to paint over the cut marks to make them black, because my handle had something beige in it that really stood out once I'd cut it off.

The second step was to collect all my odd black and shiny buttons and select a bunch for the clutch.

Then I arranged the buttons the way I wanted onto the clutch. When I was done deciding how and which buttons to place, I cut the button backs off with my wire cutter. Button with heels are otherwise very tricky to attach.

Now it was time to glue the buttons to the bag. At first I opted to use my glue gun for this, but I quickly realized that the gun glue did not stick to the bag. What it did do though was to fill the buttons with glue, making them flat on the back. So I gluegunned every button first, stuck it on the bag, then after they had cooled down removed them one by one, added some superglue and put them back. So to sum this process up I used the glue gun to fill the buttons making them flat and then attached them to the bag with superglue.

Finally, I stacked a pack of books on the clutch to make sure the buttons were pushed to the clutch real tight. I left them like this overnight for the superglue to try.

And that's how I got myself a really glamorous button embellished clutch.
As always, if you have ANY questions (like what's the second book in the stack?), let me know in the comments and I'll do my best to answer.
Happy crafting!


Su nööbid on mu juba ammu ära võlunud, nii et peab hakkama ka ise neid kuskile toppima :)
ReplyDeleteJa muidugi mulle väga meeldib ka su kleit!
Kleit on juba ammune kaltsuka leid, aga liialt kauaks kappi seisma jäänud :)
DeleteI love this! I have some old clutches that could really use some spicing up ;)
ReplyDeleteAnd it's a pretty easy process as well. Such as simple yet rewarding project :). I hope you'll get around to it!
DeleteHow cute! Your pictures are great too. :) Thank you for linking!
ReplyDeleteThank you for hosting the party!
DeleteHi Hanna, your blog is very beautiful, I like the clear graphic and the beautiful pictures, congratulation for the great job you did! :D
ReplyDeleteThank you for stopping by and taking the time to comment! I truly appreciate your feedback :)
DeleteI've got a cottage cheese container of brass military buttons that I could not figure out what to do with and now I think I do. :) Thanks for the idea!
ReplyDeleteThat sounds fabulous! I wish I could see the result.
Delete